Git 101
August 09, 2019
Quickly recharge your minds with git commands here !!!!
What is Git
- Git is version control system that means it stores and creates a timeline of all your changes done to the code.
- This allows you to return to your code when something gets messy or when needed to look at something that you did previously.
What is GitHub
- GitHub is a cloud code hosting platform for version control and collaboration. It lets you and others work together on projects from anywhere. It’s a go to place for most of the open source projects.
How does it work

Working Directory
- Area where of our files and directories and changes are living the time.
Staging Area
- Files and directories that explicitly added to the staging area
Git Repository
- Where our snapshots are stored
Working with Git on Linux
Installing Git
- Open a terminal window.
- Copy, paste and run thethe following commands and hit Return.
sudo apt-get updatesudo apt-get upgradesudo apt-get install git
Getting started
Create a new repository
git init
Inside a folder execute to make it as a working repository
git status
To know what is going on in the working directory, what are the changes and what has been staged
Adding files
git add .
To stage all the changes done in the current working directory like adding files and modifying the existing contents
git add *file name*
To stage the particular file *file name* in which the changes were done
Adding multiple files of a certain type
git add *.any extension*
To stage all the particular file types *.any extension* to which changes were done
Adding all files in directory (including hidden)
git add -A
To add all files and folders from the directory that you’re in. This is a good command for adding everything in your project, all at one time
Removing Files that are staged
git reset HEAD *file name*
To unstage a particular file which is ready to be committed. will be seen as untracked file
Ignoring files
touch .gitignore
Add files and folders to ignore those from staging and committing. These files will not be tracked any more. Keeping the files to only local usage
Commit the staged files
git commit -m *message*
To commit the staged file or files to the git repository
Log view
git log
To get the log of all the commits done
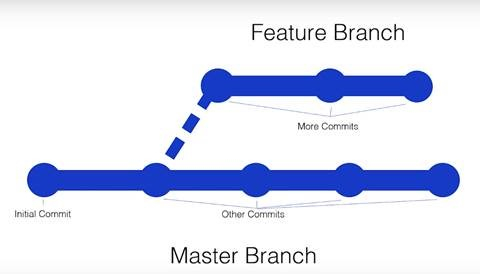
Git Branches
Listing all branches
git branch
To list all the branches in a repository
Adding a branch
git checkout -b *branch-name*
To create a new branch and will switch to it
Changing branches
git checkout *branch-name*
To switch to an existing branch
Merging a branch
git merge *branch-name*
Current branch will merge to an existing branch
Removing a branch
git checkout -b *branch-name*
To remove an existing branch
Now comes the final part
Link your Project to github.com
git remote add origin *repository ssh link*
Create a repository in GitHub(explained below) and get the SSH link to add to your local repository
git remote -v
To view the status of the repository connection
git push -u origin master
To push all the committed changes done to the working directory
git pull
To get all the latest commits from the GitHub repository
git remote remove origin
To remove the remote repositories from your local git
Thanks to Ian Schoonover for the guide.
Working with Github
Create a Repository
Repositories are used to store folders and files – anything about your project.
- Go to github.com
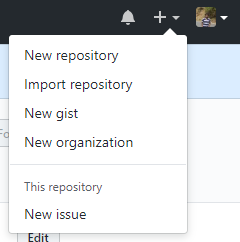
- In the upper right corner, next to your avatar , click and then select New repository.
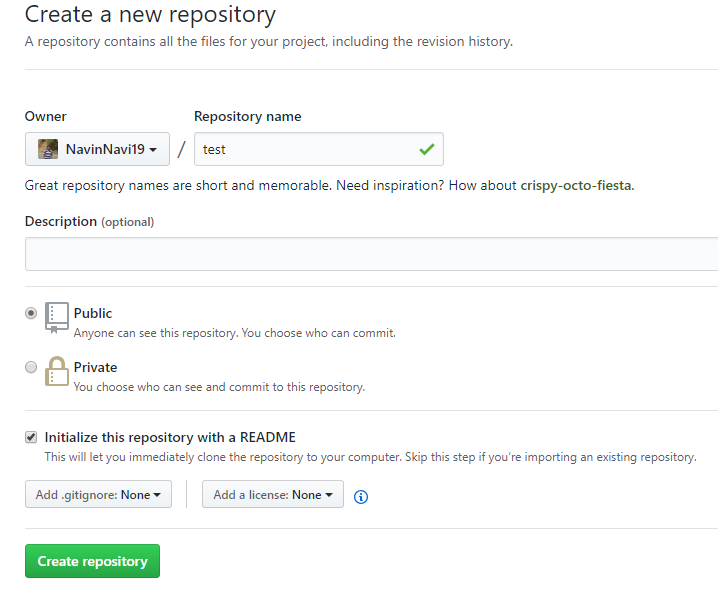
- Name your repository.
- Write a short description.
- Select Initialize this repository with a README.md
- Click Create repository
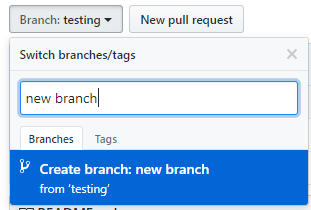
Create a Branch
Create a new branch to make a copy of your repository in the master branch as working in new branch wont affect the master.
- Go to your new repository.
- Click the drop down at the top of the file list that says branch: master.
- Type a branch name into the new branch text box.
- Select the blue Create branch box or hit “Enter” on your keyboard.
Edit and commit changes
On GitHub, saved changes are called commits.
- Click the pencil icon in the upper right corner of the file view to edit.
- In the editor, write a bit about yourself.
- Write a commit message that describes your changes in new branch.
- Click Commit changes button.


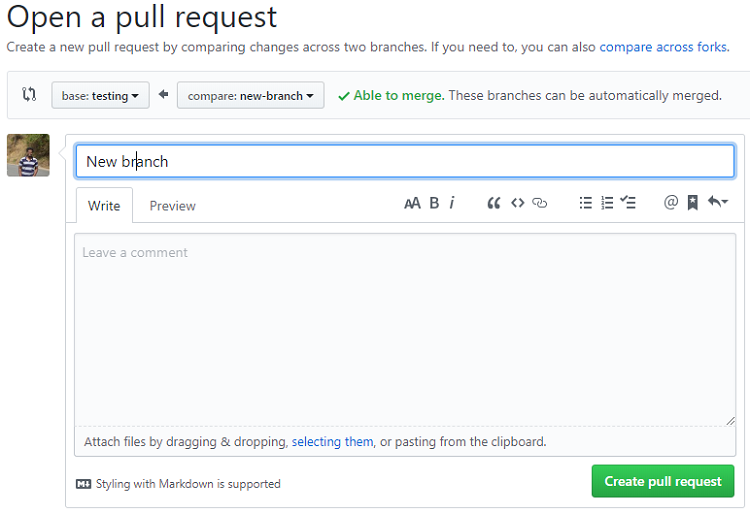
Open a Pull Request
- Click the Pull Request tab and click the green New pull request button.
- Look over your changes in the diffs on the Compare page.
- Click the big green Create Pull Request button.
- Give your pull request a title and write a brief description of your changes.

Merge your Pull Request
- Click the green Merge pull request button to merge the changes into master, after the code review and approval.
- Click Confirm merge.
- Now that your changes are pushed to master, go ahead and delete the branch. If you wish!!!

Complete flow


Thanks to GitHub Guides for the article reference.
Finally, I hope this post was valuable for you so please, please share your feedback and suggestions to help me improve.